This is a short Application Note about how to use ST7735R Controller based TFT screen with RaspberryPi Universal Expansion Board and RaspberryPi. More information about the screen can be found in the list of my Peripheral Boards.
Part I: Hardware
Connect RaspberryPi, RaspberryPi Universal Expansion Board and the ST7735R Controller based TFT screen as Figure 1.
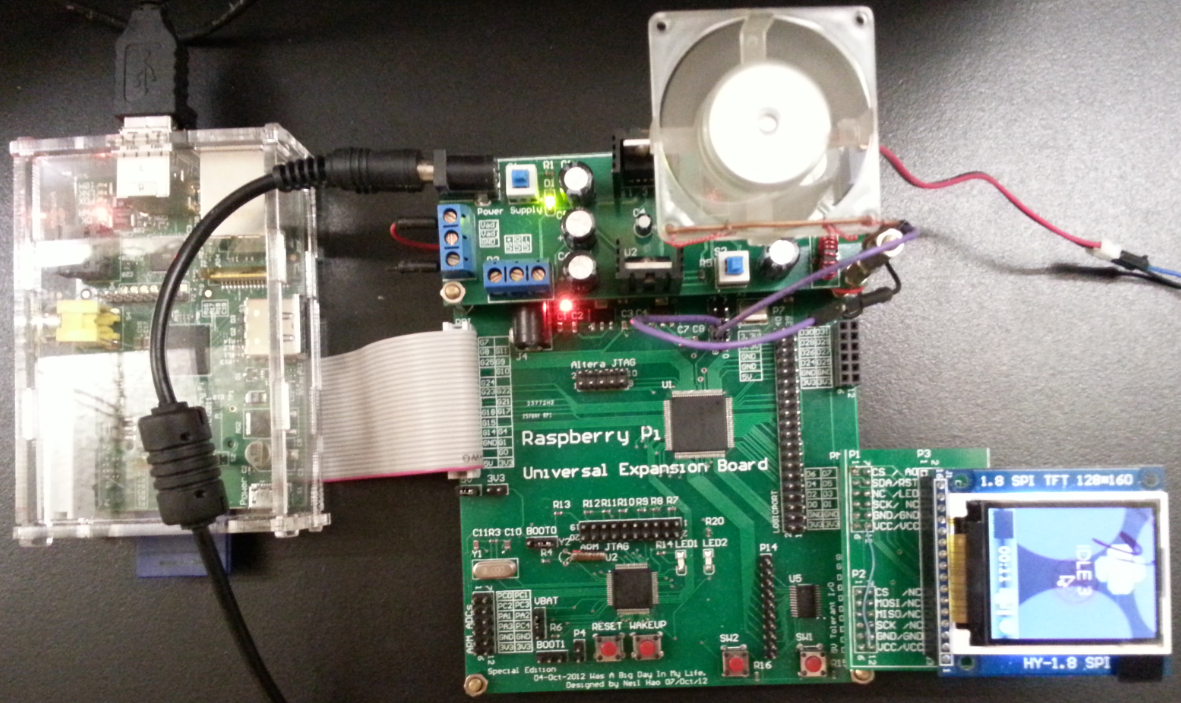 Figure 1
The SPI interface of RaspberryPi needs to be mapped to the screen by using following Verilog code.
module RS232(RXD_in,TXD_in,RXD_out,TXD_out,
CS_in,CS_out,SDA_in,SDA_out, SCK_in, SCK_out, A0_in, A0_out, RESET_in, RESET_out, LED_in, LED_out);

input   RXD_in, TXD_in,CS_in,SDA_in,SCK_in,A0_in,RESET_in, LED_in;
output  RXD_out,TXD_out,CS_out, SDA_out,SCK_out, A0_out, RESET_out, LED_out;

assign RXD_out = RXD_in;
assign TXD_out = TXD_in;

//assign pins for ST7735R LCD Controller
assign CS_out    = CS_in;
assign SDA_out   = SDA_in;
assign SCK_out   = SCK_in;
assign A0_out    = A0_in;
assign RESET_out = RESET_in;
assign LED_out   = LED_in;

endmodule
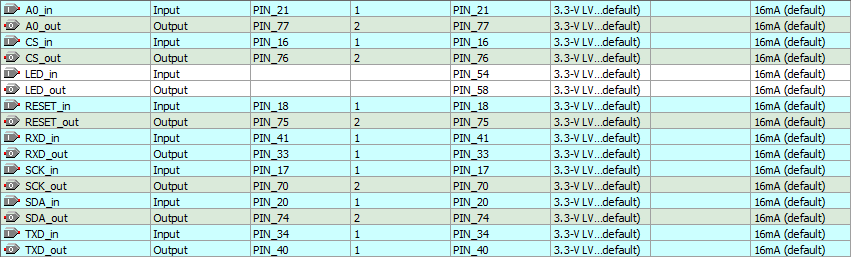
Navigate to Quartus -> Assignments -> Pin Planner. The IO need to be configured as following picture.
We can flash the design into the CPLD right now.
Part II: Linux Kernel
Follow Mark's article Raspberry Pi and TFT Display to cross-compile and install the kernel with the screen driver on the RaspberryPi.
Part III: Testing
During the booting and shutdown processes you will see the kernel messages on the screen, the uname -a command will show you the message similar as the Figure 2.
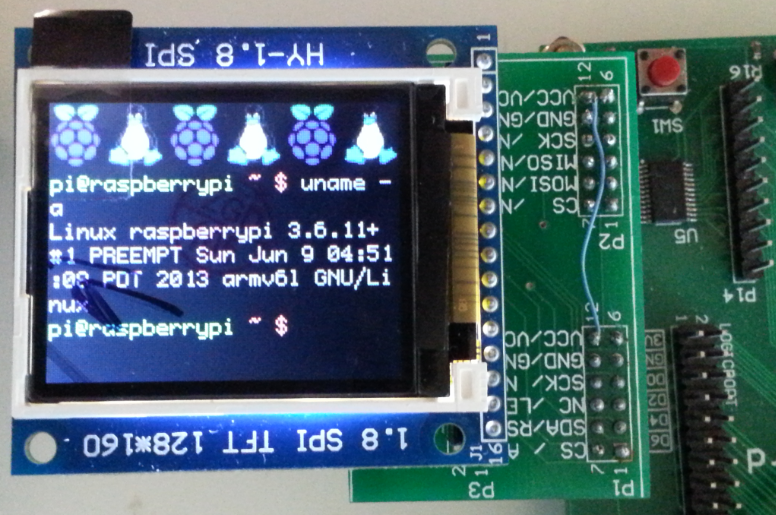
Figure 2
Entering
FRAMEBUFFER=/dev/fb1 startx
will launch the x11 environment as the Figure 3:

Part IV: References
[1] Kamal Mostafa. Adafruit/SainSmart 1.8" TFT LCD display for Raspberry Pi. Retrieved from http://www.whence.com/rpi/
[2] Mark. Raspberry Pi and TFT Display. Retrieved from http://marks-space.com/2012/11/23/raspberrypi-tft/